There’s something about having a wreath hanging on your front door during the holiday season.
Just a glimpse of one and you somehow get wrapped up in the festive spirit. And before you know it you’re wearing your Santa hat and singing Christmas carols!
Well today we are bringing you a few options to adorn your home, office or business with a wreath of its own.
Let’s start with the easy option.
We can make one for you!
Our basic wreaths come in either a circle or square shape and start at $50.
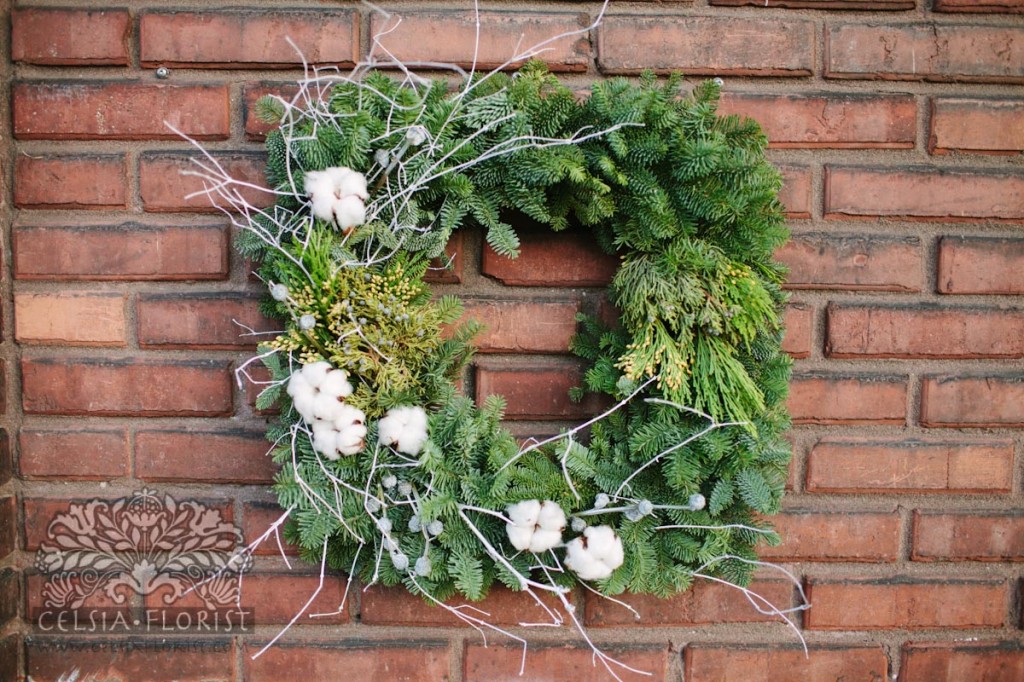
Square wreath finished with seasonal greens, branches and cotton. Also available as a round wreath. Priced from $50.
If you are after something a little more luxurious, how about our gorgeous candle centerpiece wreath finished off with roses and succulents?
Or if you are feeling crafty and creative, why not make one yourself?
This week we hosted a wreath-making workshop with a group of ladies from Nicola Wealth Management and they each completed the evening with a beautiful wreath to take home.
Here’s how they did it:
1. Start with a pre-greened wreath (available from Celsia Florist).
2. Gather decorative trimmings such as eucalyptus, magnolia, berry branches, bog myrtle branches and pine cones or other ornamental/decorative items. The tip ends of the branches work best.
3. Begin to layer the first item on to the wreath following the same direction as the greens. For now just push the stems of your items into the existing greens frame. We will secure them in place later.
4. Choose your next decorative item/branch and place it so that the greens/leaves overlap the first branch and cover the stem. Make sure that all the stems face the same direction on the wreath.
5. Continue inserting the decorative items/branches until you have completed the circle or are happy with your design.
6. Add pinecones/ornaments/bows by twisting a piece of paddle wire around the base of the item, leaving a tail of 8 to 10 inches. Tie the wired item’s tail to the wreath.
7. Once all of your trimmings are on the wreath, take paddle wire and wrap in a continuous motion all the way around your wreath to secure the loose stems in place. Lift up some of the greens as you go to cover the exposed wire and keep some volume to the wreath.
8. When you are back to your starting point, tie the wire off and tuck the loose ends in to the back of your wreath.
9. Twist some wire and make it into a loop which you can attach to the back of your wreath to form a hook with which to hang it.
10. Proceed to your front door, hang you wreath and stand back to admire your creation.
If this sounds like a little too much work, place your order for a wreath with us! We ask for one day’s notice for any wreath arrangement.
Contact us for more information regarding in-store workshops.
See our full range of Winter products at our new online store.


